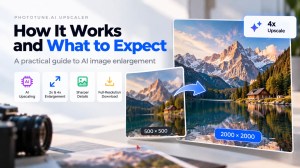
If you’ve tried AI photo upscaling and gotten results ranging from impressive to underwhelming, the difference usually comes down to the tool and how you use it. This guide covers what the Phototune.ai upscaler does, how it approaches image enlargement, and what kind of output you can realistically expect across different source types.
Table of Contents
ToggleWhat the Tool Does
The Phototune.ai upscaler takes a low-resolution image and produces a larger version with reconstructed detail — not just stretched pixels. It offers two scale factors: 2x and 4x. A 1000×1000 pixel image at 2x becomes 2000×2000; at 4x it becomes 4000×4000. The output is a full-resolution download with no compression applied by the tool itself.
The process is browser-based. No software installation is required, and no account is needed. You upload the image, select your scale factor, and download the result — the entire workflow takes under a minute for most images.
The AI Approach: What’s Different About It
Standard image scaling — the kind built into every operating system and image editor — works by interpolating between existing pixels. The math is straightforward: to double the image, the algorithm estimates what the new pixels between the existing ones should look like based on their neighbors. The result is mathematically smooth but visually soft. Fine detail doesn’t survive well because the algorithm has no basis for inventing it.
AI upscaling works differently. A neural network trained on large datasets of image pairs — low-resolution and high-resolution versions of the same content — learns the statistical relationship between coarse and fine detail. When it processes a new image, it doesn’t interpolate; it predicts. Given the texture of a fabric weave at low resolution, the model predicts what that weave looks like at high resolution. Given a portrait at limited pixel count, it reconstructs how hair, skin, and fine features would resolve with more data.
The practical difference is visible in areas with texture: edges are sharper, surface detail is cleaner, and fine elements like text, stitching, or foliage resolve rather than blur. The gap between AI and traditional upscaling is largest at 4x; at 2x the difference is noticeable but smaller.
What to Expect: Results by Image Type
| Image Type | Expected Result | Notes |
| Product photos with texture | Strong improvement | Fabric, leather, packaging detail reconstructs clearly |
| Portrait photos | Strong improvement | Hair, skin texture, fine features benefit from AI reconstruction |
| Landscape and nature photos | Strong improvement | Foliage, stone surfaces, water texture all respond well |
| Old or scanned photos | Good improvement | Limited by original capture quality, but AI recovers what the scan contains |
| Cropped images | Good improvement | Tight crops lose pixel count; AI restores usable resolution for most purposes |
| Flat graphics and illustrations | Moderate improvement | Less texture to reconstruct; traditional scaling competes better here |
| Heavily blurred or out-of-focus | Limited improvement | Upscaling makes the image larger, not sharper — focus problems are not corrected |
| JPEG artifacts present | Variable | Start from the best-quality source; artifacts can become more visible when enlarged |
Choosing Between 2x and 4x
The right scale factor depends on where you’re starting and where you need to end up.
- 2x is usually right when the source is already a reasonable size and you need a moderate resolution boost. A 1920×1080 image upscaled 2x produces 3840×2160 — native 4K. A 1000×1000 product photo at 2x becomes 2000×2000, which meets zoom requirements on most marketplaces.
- 4x is the better choice when the source is small or the gap to your target output is significant. Supplier photos at 500×500, heavily cropped images, or small scans all benefit from 4x enlargement. A 500px source at 4x produces a 2000px output — reaching display and print requirements that 2x wouldn’t achieve.
- You don’t have to apply the full factor. If your use case only needs 3x enlargement, a 4x upscale followed by a resize down to your exact target dimensions gives you the best result. The AI-processed pixels will hold up better than source pixels scaled 3x directly.
File Format and Input Quality
The upscaler accepts JPG, PNG, and WEBP files. For best results, always use the highest-quality version of the image available:
- PNG and uncompressed-quality JPG are preferred inputs when available — no compression artifacts to work from
- If JPEG is the only option, use the highest-quality JPEG (largest file size) rather than a compressed version
- WEBP files are accepted directly; there’s no need to convert before uploading
The output is downloaded at full resolution. File size will be significantly larger than the source — a 4x upscale produces sixteen times the pixel data, and even with standard compression the output file is substantially bigger than the input.
Common Use Cases
The Phototune.ai upscaler handles a range of practical tasks:
- Supplier and manufacturer product photos — typically 500–800px, upscaled 4x to meet marketplace zoom requirements
- Cropped portrait or product photos that lost resolution after tight framing
- Old digital photos and scans from the 1990s and early 2000s — limited by original camera or scanner resolution
- 1080p display assets that need to reach 4K resolution for modern screens
- Phone photos intended for large-format prints where the source doesn’t have enough pixels at 300 DPI
The Phototune.ai upscaler runs entirely in the browser — upload your image, pick 2x or 4x, and download the result. No account required, no software to install.